
Hello everyone, this will be a blog about my journey through building my workshop. While I was in school at Triangle Tech, I found a love for woodworking. I knew I wanted to make it a career someday and over the last 2 years, I have turned that into a reality. I started from a blank space in our warehouse where Tomahawk Construction head quarters is. This was a space behind my dads cigar lounge that we just stored things in. It really wasn’t used for anything in particular and due to the size of the space, I knew it would make a perfect wood shop. I have put countless hours into building this into my dream and I am so glad I am able to share that with you here so lets get started!

This is the very first photo I took of my shop. Unfortunately I did not take any true before pictures of the space which I am now kicking myself for not doing. As you can see in the back is where we stored miscellaneous items. In the middle is my first table saw I bought with some Jorgensen clamps. This was the very beginning. This was January 7th, 2022. This is where it all started.
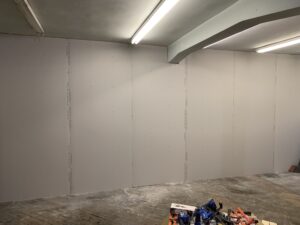
This is that same wall but now with drywall.
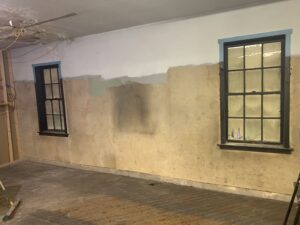
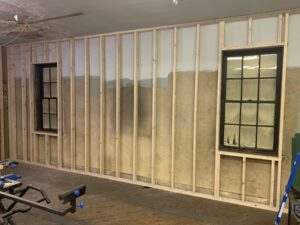
These are both photos of the far back wall
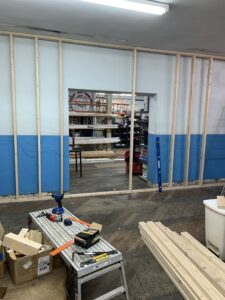
This is the wall where my main entry door is. I did not take any after photos of this wall for some reason but in future pictures you will see what it looks like. The fourth wall already existed from when we built my fathers cigar lounge. That wall also has a single door so that my shop has 2 entry points.
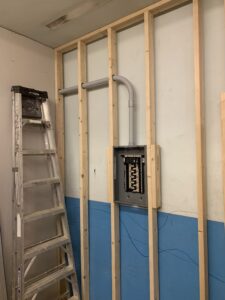
I also added the electric in my shop. This is the only photo I took. I did take a video of it once it was completed which I, unfortunately, cannot put here. It was a simple 100 amp sub panel that I ran from the big 200 amp panel in our shop. Fortunate for me, the distance from both boxes is not very long so I only had to add a smaller run of conduit to the new sub panel and so forth.

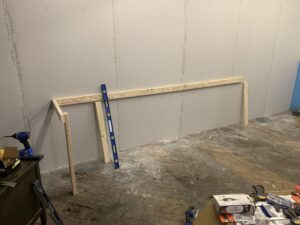
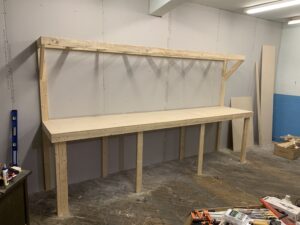
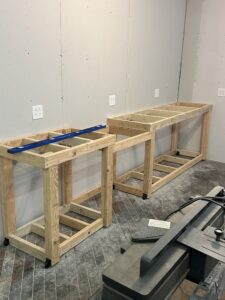
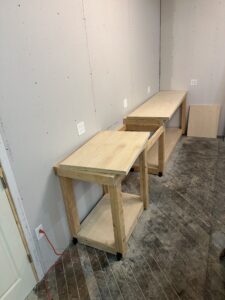
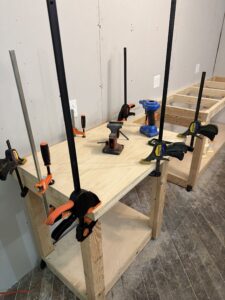
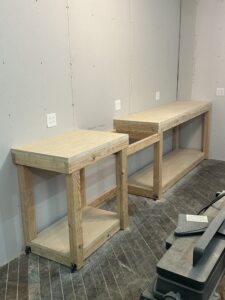
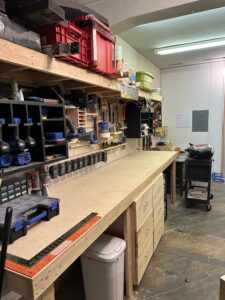
This was the first bench I built inside my shop. It is 12′ wide, 40″ high, and 24″ deep. I then build another smaller 10″ deep shelf above it for storage. I used cabinet grade maple plywood for the top of this and finished it with polycrylic. The top storage shelf was a piece of 3/8″ sheathing. This would eventually become my french cleat rack area where I store all of my power and hand tools. This bench was built into the wall as a permanent structure as well.

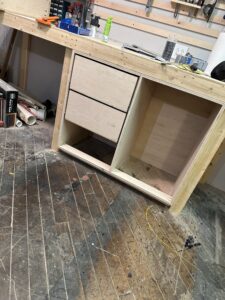
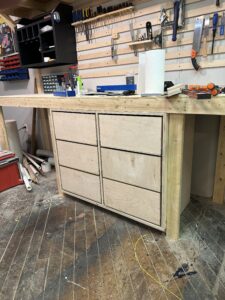
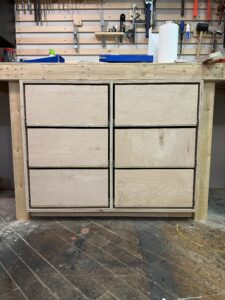
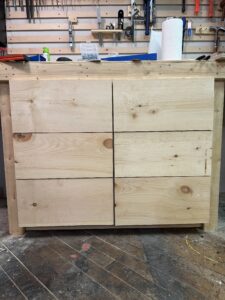
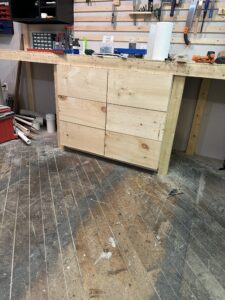
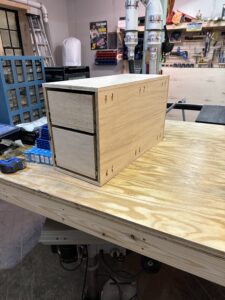
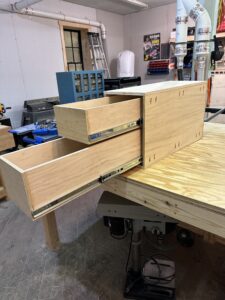
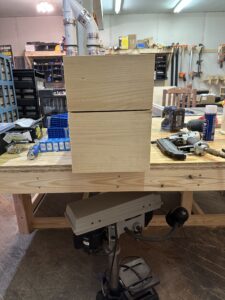
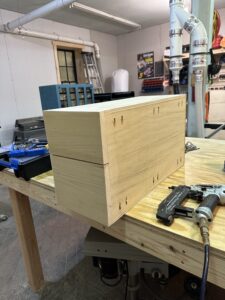
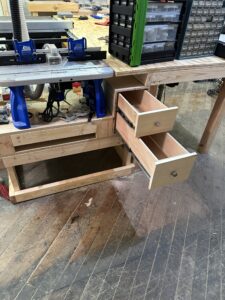
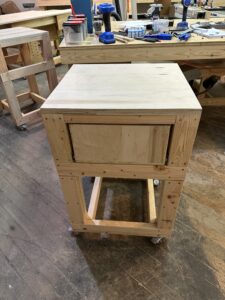
This is the very first base cabinet that I built from scratch. It is underneath the counter from above, directly in the middle. The frame was made from 3/4″ maple plywood and the drawers were made from a combination of 1/2″ and 3/4″ plywood. The faces are solid unfinished pine. In the future, I plan to upgrade the faces to a better select pine and finish with an oil. I put basic brushed nickel handles on the faces as well. These are where I keep a multitude of items. From hand tools, measuring tools, and smaller saws, to all of my electrical material and Kreg jigs.

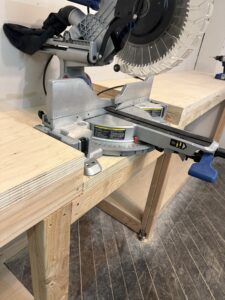

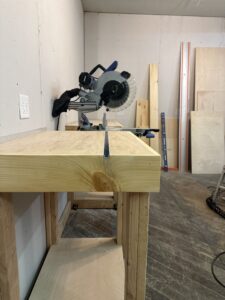
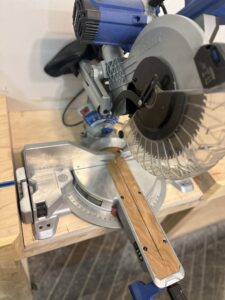
This is my miter saw station. I made this from a plan I found off of YouTube from PatriotDIY. The plans for this are on his channel. The top is 2 sheets of 3/4″ maple plywood glued together to create a sturdy and durable 1 1/2″ thick top. This was made in 3 sections (both ends, and the saw base) which is convenient due to it having the ability to be disassembled and possibly moved in the future if need be. Each post has a leveling foot installed so that I was easily able to make both tables completely flat with the base of the saw. I used a t-track I bought from amazon as my hold down rail. I can use different types of jigs on this to be able to make repeated cuts or hold down material. Shelving was placed on the base which is used for storage now for different tools and materials. The Kobalt saw in the photos has since been replaced with a new DeWalt DWS780 (fantastic saw).
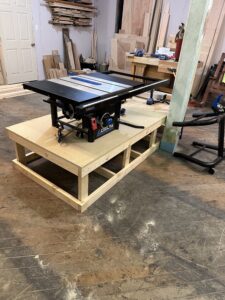
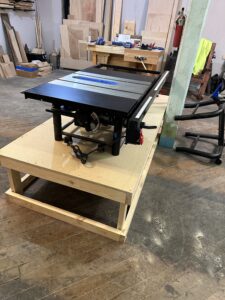
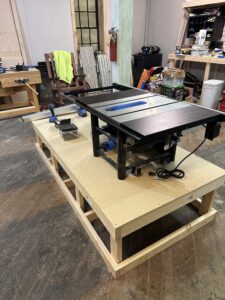
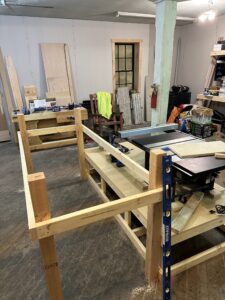

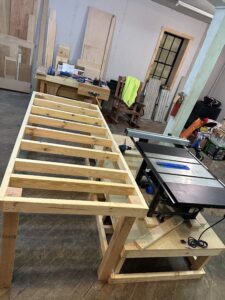
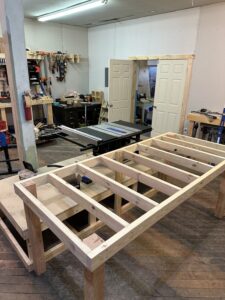

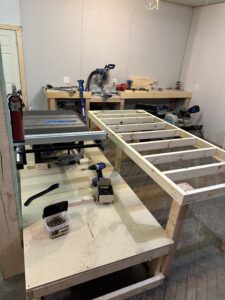

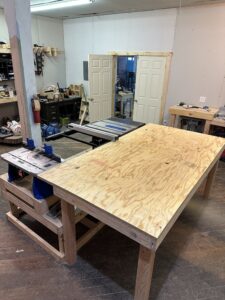
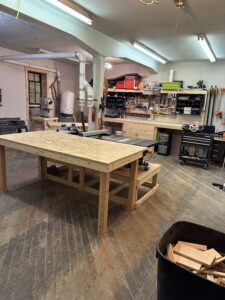
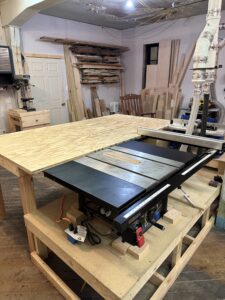
This is my table saw station that I designed myself. It is my main out-feed for the table saw and also an extended in-feed for my router table. It is also my main work station. I do basically everything on this table. It sets in the middle of my shop and definitely takes up the most space. the base for the saw and router table are made from 2×4 lumber and particle pine board. I then build a frame from 2×4’s and 4×4’s for legs for the table itself. Getting this perfectly in line with the out-feed on the tables itself was a little tricky to be honest. I did not expect it to be as challenging as it was, but in the end, I believe it turned out well. The top is 4′ wide and 7′ long. the top of the table is 2 sheets of 23/32nds sheathing. I finished this with a one coat polyurethane. I routed 3/4″ groves as well to extend the miter gauge slots in my table saw. I went for this cheaper option because I knew this is where I would be doing all of my finishing, gluing, and panel cutting. I did not want to spend nearly $90 a sheet on 3/4″ cabinet grade plywood, knowing it would get pretty beat up in a short amount of time. After multiple projects, I am sadly able to say this cheaper option was a mistake. I wish I would have went with the cabinet grade plywood, MDF, or even laminate. Over time, this top has slightly warped and is no longer completely flat. In the future I will definitely be changing this to a better top. It does do the job for the time being though.

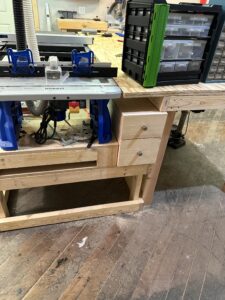
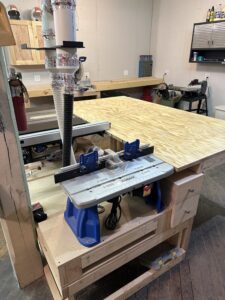
This is my router bit storage. I had a small empty space between my table leg and the router. I decided this was a perfect place for some small drawers to store all my router bits and router accessories. It was made from 3/4″ and 1/2″ plywood. The faces are unfinished pine with brushed nickel knobs.

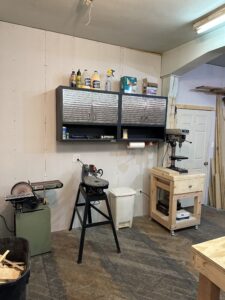
Here is a mobile base that I built for my bench top drill press. I also built an identical one for my bench top band saw. I put them on caster wheels so they are easily movable. I do move these tools often for cleaning so I am glad that I went with this option. I do not have any specific photos of them finished but you will see them at the end in the final pictures.
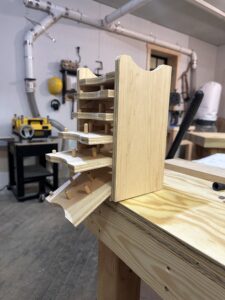
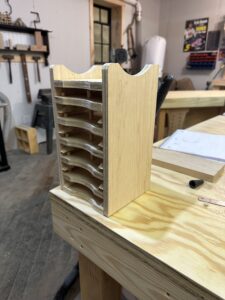
These are actually the only photos I took of the tool holders that were built for the french cleat wall. This is for my 5″ orbital sander holder with pullout shelves for the sandpaper. It is made from 1/2″ plywood. These plans were from Old Rust Crafts on Youtube. It works very well and it sturdy.
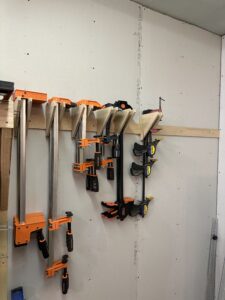

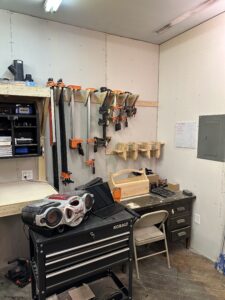
Here is my clamp storage. This is a french cleat style. I used different styles from different plans and came up with these. They are unbelievably strong. I have (6) 3′ pipe clamps on 2 different cleats at the end and it is strong enough to hold them so I am very impressed. The clamp selection has definitely grew since these pictures were taken.
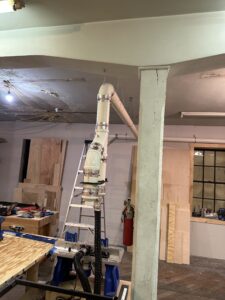
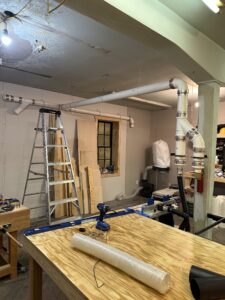
This is my dust collection. I used 4″ PVC and HVAC foil tape for the joins. I did not attach any joints with glue so I am able to disassemble and/or add in the future. It runs along the back wall with a T in the middle that goes to the table saw and router table. I use blast gates at every tool so that only one tool at a time is getting full power. I also added 18 gauge copper wire around all of the PVC to discharge static electricity that may develop inside or around the pipe and prevent disaster. I have since added a DeWalt planer to this collection. I keep one end capped to be able to release a clog if need be. I have extensively used this system since installed and it has worked perfectly for me so far. I am thoroughly impressed with this.
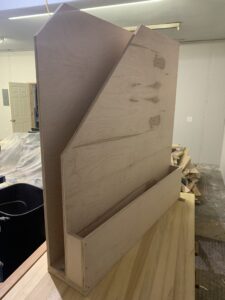

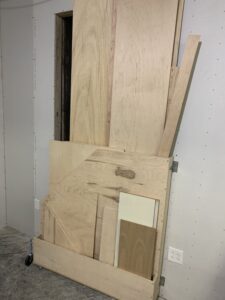
This is my plywood storage rack. The plans came from The Wood Whisperer on Youtube. It is made from 3/4″ and 1/2″ plywood. the back section is larger and has the ability for larger sheets to be slid in whereas the front storage is more of a shelf/bin for smaller pieces to fit into. It attaches to the wall with a hinge and on the other end is a spring loaded wheel so it is able to be swung out from the wall. This is an extremely convenient storage idea for any shop.
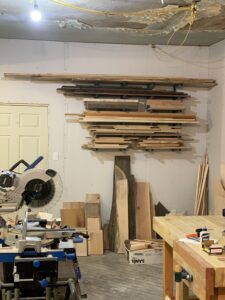
This is my wood storage area in my shop. I used 4 Bora racks for the wall. These are quite strong and I would recommend them to anyone. The larger pieces of solid wood were placed against the wall on the floor. This collection on the floor has easily doubled since this photo was taken. I am honestly starting to run out of room!
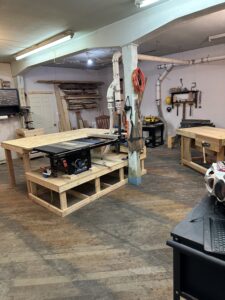
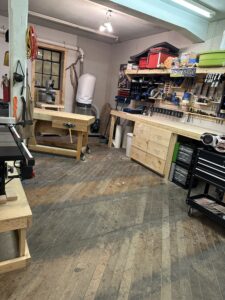
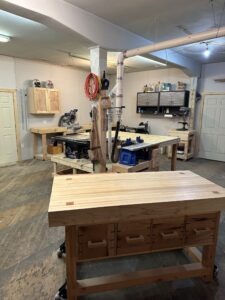


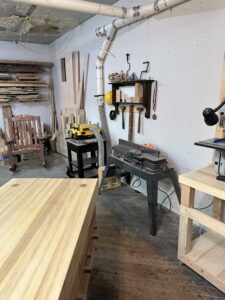
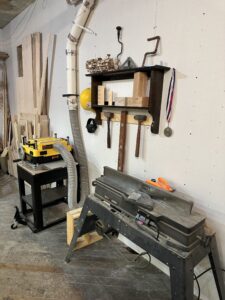
Here are the finished pictures of my shop. I learned so much through this Journey. It has brought me great joy so far and hopefully for many years to come. Some day I hope to expand to a much bigger space but right now, this is absolutely perfect for me. The good Lord above has blessed me with the ability to turn my dreams into a reality and I cannot thank him enough! I truly enjoy woodworking and being able to do this for myself was an accomplishment like no other. I thank my family for their support and most importantly my wife for allowing me to follow my dreams and, well, spend large chunks of money on this. This one hundred percent would not have happened if she did not back me every step of the way.
I thank you all for reading my first Shop Blog! Your support is what keeps me going. Please check out the rest of the site for projects that were made in this shop and hopefully it gives you a desire to have me build something for you! I post regular updates on everything on my Facebook and Instagram. Thanks again and God Bless!