
Hello everyone! This is a Blog in my Custom builds about the workbench I built while I was at Triangle Tech. While I was there for a degree in Carpentry and Construction, part of the curriculum was to learn the basics of woodworking. Over the first three semesters I was there, we did many little projects to get ourselves familiar with woodworking and for our fourth semester we had to take on a challenging project that we had the duration of the semester to complete. I remember in my first 3 semesters seeing all of the fourth semester students working on their projects and it would make me so excited and anxious to start my project. I originally wanted to build a coffee table with a hydraulic extendable top but the more we learned about the topics of woodworking, I decided that I wanted to turn this into a serious hobby. After days of pondering, I decided the best first addition to a future shop would be a nice work table. So this is where it started. Here is the process I took to build the table. Enjoy!

This is the lumber I started with for my project. I will start off by saying that I wanted the top to be made out of pine (due to cost). Well, we went on a trip to Alderfer Lumber in my fourth semester and while we were there, some of us decided to get the lumber for our projects. At the time, they didn’t have much pine left so the one employee told me that poplar would be a good alternative and thought it may even be more pleasing to the eye. At this point, I was still familiarizing myself with different wood species and I have never worked with it before so I decided why not? It was only a couple cents more per board foot than pine anyway. I am so glad that I was urged to go this route. I think it is a more pleasing look to the eye due to its different color variations as well as grain pattern. Its not as simple and bland as most pine is. This has green and purple undertones as well which really pop when a finish is applied.
I went with 6/4 (1 1/2″) boards that when milled down ended up being about 1 7/16″ thick. they were also 5″ wide and all were at least 5.5′ long.
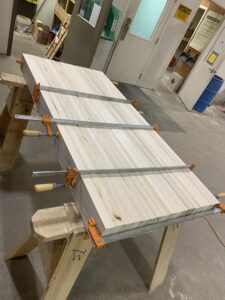
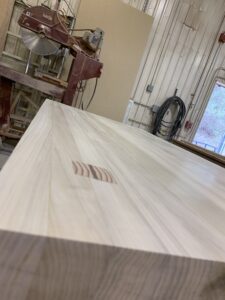
This is the top after the final glue up. The original glue up was done in 2 sections because the final width of this top is wider than the maximum width allowed in the planer that we had in the shop. So, I glued it up in 2 sections, ran both sections through, and then glued those 2 sections together. This is those 2 sections together in the final glue up. Due to them being face glued like this I did not add any type of joinery (biscuits or dominos) because the glue would be plenty strong enough to hold it across its 5″ thickness. The final dimensions of the top are 35″ wide, 5.5′ long, and 4 7/8″ thick. This top alone weighed nearly 200lbs. Once this was ready, we were able to have 4 of us lift it to the 36″ wide drum sander to flatten the top and bottom to its final thickness. The drum sander was a huge blessing because getting it flat with a belt sander would have taken days due to the limited time we had to work on our projects during the day.
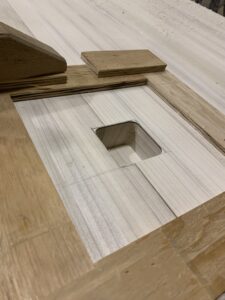
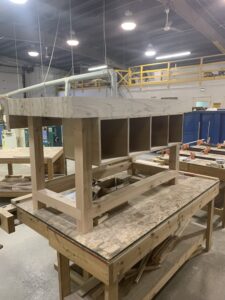
The next step was to add mortises in the top for the tenons on the base to go through. This was quite challenging due to not being able house a drill press. I had to create a router jig which is shown in the picture. I was able to use this to route about 2″ deep on both sides but that still left an inch of material that needed to be removed. I decided to buy a portable drill press that attaches to a drill to be able to accurately drill straight down through the remaining inch. To my surprise it worked quite well. I then had to use a chisel to get it into the final square shape. Me and the other 2 guys in my class definitely got a work out due to having to flip this top multiple times each day so I could be sure each mortise was square and accurate.
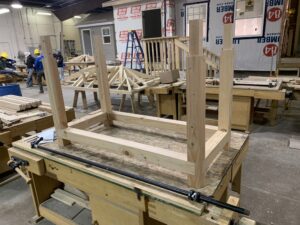
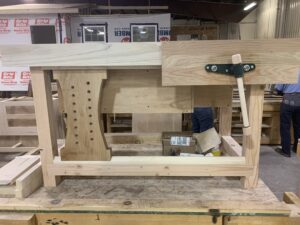
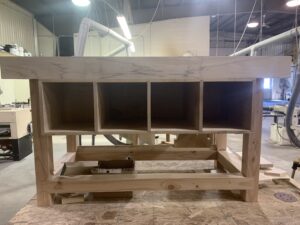
This is the base that was built for it. This was made from 4×4 pine posts that were milled square. The base was supported at the bottom with half lap joints that were completed on a mortising machine. As you can see, the tops of the posts have the tenons cut out.

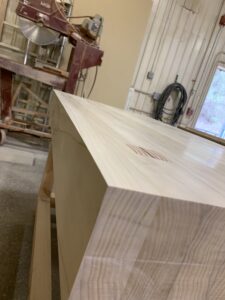
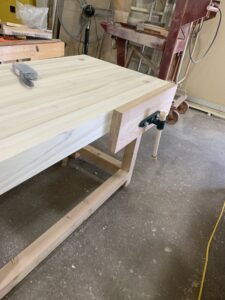
This was when we were able to get the top attached to the base. I did not actually glue the base to the top. The weight alone was definitely enough constant pressure to keep it from not moving. I did however, cut slots at the top and insert walnut wedges to spread out the tenons for a more secure fit.
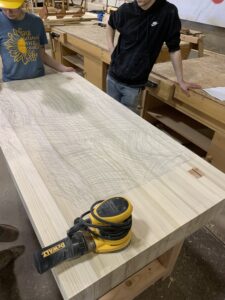
I then sanded the top starting at 80 grit and worked my way up to 220 grit.
I added a vice on the side. I used 2 oak stair treads face glued together to get a 2″ thick vice face. The handle is maple and was premade with maple screw caps at the end.
I also installed a sliding dead man with dog holes to be able to clamp down large slabs for debarking them. This was made from sycamore. I used Minwax’s paste wax on the top and bottom of the deadman so it was able to slide easily and to this day without adding anymore, it still slides perfectly.

On the opposite side of the vice and deadman, I wanted to add drawers. I made them all the same size other than the one behind the vice which was not as deep. This frame was made from Sycamore as well. This is the only part of the project where screws were used. They were simply used to attach the drawers frame to the top incase I ever wanted to remove them.
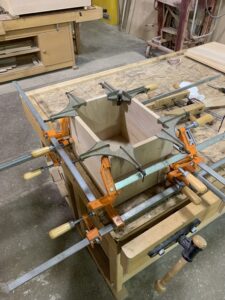
This is a glue-up of one of the drawers. People always say you can never use too many clamps. I wanted it to be as square as possible and obviously be sturdy as well.
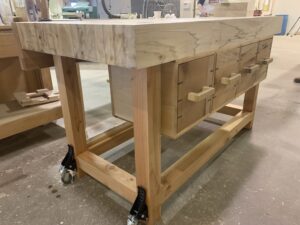
This is where all the drawers were finished and custom made poplar handles were added. I also added 3 walnut splines to the corners of the drawer faces. I also used paste wax here for the drawers because I did not want to lose space by adding drawer slides. Again, to this day the paste wax has still held up. I also added locking workbench caster wheels to the bottom. These are different than the traditional casters due to the fact that, when unlocked, the weight is lifted off of them and the bench sits firmly on the floor. You have to step on the black lever to engage the casters. These casters are only rated for 100lbs each so I was nervous they wouldn’t hold up over time but I have left them engaged in my shop for days at a time and never had an issue.
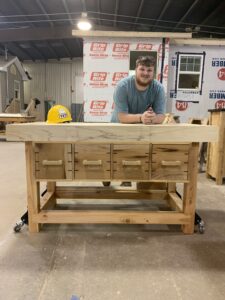
This was the final product. I was so unbelievably happy with how it turned out. I finished the entire bench with tung oil because I wanted the natural grains in the wood to pop without adding a stained or tinted finish. I have 6 different types of wood in this project; Poplar, Pine, Walnut, Sycamore, Oak, and Maple. Overall, it took me around 40 working hours to build this workbench. With it being my first major project I ran into a lot of challenges but I also learned so much. Between advice from my instructors and classmates, I was able to make this exactly like I imagined it.
I got this design from Dimensionswoodworks on Youtube. I hand drew all of the plans for this project.
Thank you to everyone who read this blog and God Bless!
Jesse Rodgers
JR Woodworks